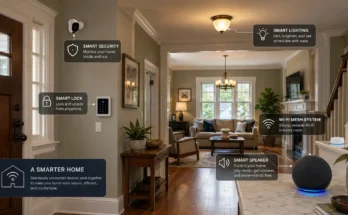
In my years as a Smart Home Integrator, I’ve noticed a common pattern. A client starts with a few devices from different brands—a Ring doorbell, Philips Hue lights, a Nest thermostat. They love what each device does individually, but they soon hit a wall. They ask, “How can I make my Ring doorbell flash my Hue lights when someone presses the button?” or “Can my smart plug turn on a fan when my Nest thermostat hits a certain temperature?”
The built-in routines in Alexa or Google Home are powerful, but they can’t always connect devices and services from competing ecosystems. This is where a secret weapon of the smart home world comes into play: IFTTT.
IFTTT (an acronym for “If This, Then That”) is a web-based service and app that acts as a universal translator for your smart devices and digital services. It allows you to create powerful automation chains, called “Applets,” that bridge the gap between products that don’t normally talk to each other. In this guide, I’ll demystify IFTTT and show you how to create your first custom automation to unlock a new level of creativity in your smart home.
The Core Concept: “If This, Then That”
The name says it all. Every automation you create in IFTTT, called an Applet, is made of two simple parts:
- The “IF THIS” (The Trigger): This is the event that starts the automation. It’s the “cause.” Examples include:
- “If my Ring doorbell detects motion…”
- “If the time is sunset…”
- “If I enter a specific geographic area (geofencing)…”
- “If I post a new photo on Instagram…”
- The “THEN THAT” (The Action): This is what happens after the trigger occurs. It’s the “effect.” Examples include:
- “…then turn on my porch lights.”
- “…then set my Philips Hue lights to a warm color.”
- “…then set my smart thermostat to 72 degrees.”
- “…then save that photo to my Dropbox.”
By connecting different services to your IFTTT account, you can mix and match triggers and actions from hundreds of brands and apps to create automations that are impossible anywhere else.
Let’s Build Your First Applet: A Step-by-Step Guide
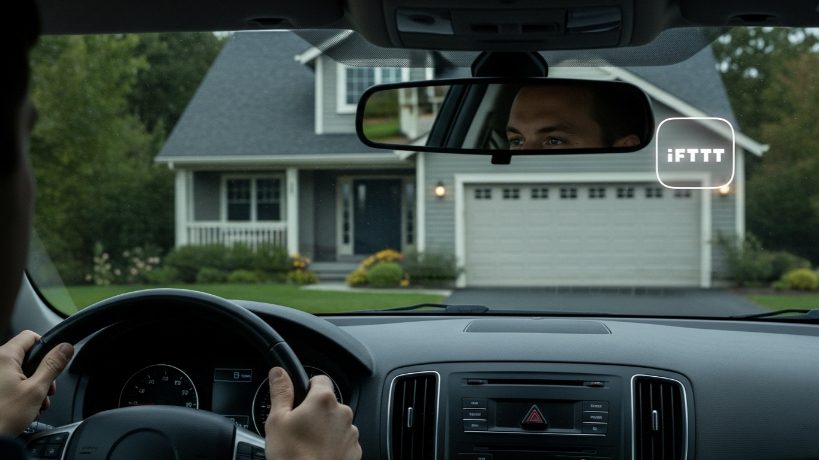
The best way to learn is by doing. Let’s create a classic and incredibly useful Applet: “If I am approaching home, then turn on my entryway lights.” This uses your phone’s location as a trigger.
- Download the IFTTT App and Create an Account: Get the app from your phone’s app store and sign up for a free account.
- Start Creating: In the app, tap the large “Create” button.
- Configure the “IF THIS” (The Trigger):
- Tap the “+ Add” button next to “If This.”
- Search for the “Location” service and tap on it. You will need to grant the IFTTT app permission to access your phone’s location.
- Choose the trigger card that says “You enter an area.”
- A map will appear. Drag the pin to your home address and adjust the circular geofence area. Tap “Continue.”
- Configure the “THEN THAT” (The Action):
- Now tap the “+ Add” button next to “Then That.”
- Search for the service that controls your lights (e.g., “Philips Hue,” “Lutron Caseta,” “Wyze”). For this example, we’ll use Philips Hue.
- You will be prompted to connect your Hue account to IFTTT. Log in with your Hue credentials and grant permission.
- Now you’ll see a list of possible actions. Choose “Turn on lights.”
- Select which specific light or room you want to control (e.g., “Entryway Light”). Tap “Continue.”
- Review and Finish: You will see a summary screen that says, “If you enter the area around your home, then turn on Entryway Light.” If it looks correct, tap “Finish.”
That’s it! Your Applet is now live. The next time you drive into your designated home area, your entryway light will automatically turn on to welcome you.
“Never Forget to Close the Garage” Applet
A client, Maria, had a constant worry: “Did I remember to close the garage door?” She would often get halfway to work and have to turn around just to check.
The Problem: A need for a failsafe, automatic reminder and action to ensure her garage was secure, especially at night.
The IFTTT Solution: Her MyQ smart garage door opener had an IFTTT service. We created a powerful, time-based Applet.
- The “IF THIS” (Trigger): We used the “Date & Time” service and chose the trigger “Every day at…” We set the time to 10:00 PM.
- The “THEN THAT” (Action): Here’s the clever part. We didn’t just tell it to close the door. We first added a “Filter” (an advanced IFTTT feature). The filter code checked if the MyQ garage door was already closed.
- The Main Action: We used the MyQ service and chose the action “Close door.”
- The Notification Action: We also added a second action using the “Notifications” service. It would send a push alert to her phone saying, “It’s 10 PM. I checked and your garage door was open, so I closed it for you.”
The Result: Now, every night at 10 PM, IFTTT acts as her personal security guard. If the door is open, it closes it and tells her. If it’s already closed, it does nothing. This simple Applet completely eliminated a source of daily anxiety for her. This demonstrates how IFTTT can go beyond simple triggers to create conditional, intelligent automations.
Getting Started: 3 Powerful IFTTT Ideas for Your Home
Ready for more inspiration? Here are a few of my favorite and most reliable Applets that I recommend to clients:
- Flash Lights for Important Notifications:
- IF my Ring Doorbell detects motion, THEN blink my Philips Hue lights in the office. (Great if you’re wearing headphones and can’t hear the chime).
- Log Smart Home Events in a Spreadsheet:
- IF my Nest Thermostat temperature drops below 60 degrees (a sign of a furnace failure), THEN add a new row to a Google Sheet with the date and time. (Excellent for tracking and diagnostics).
- Weather-Based Lighting:
- IF the Weather Underground service reports the condition changes to “Rainy” in my area, THEN set my living room lights to a cozy, warm white.
A Note on IFTTT’s Subscription Plans
IFTTT offers a free plan that allows you to create a limited number of custom Applets (currently 2). This is perfect for getting started and trying out the service. For power users who want to create unlimited Applets, use more advanced features like filters and multiple actions, and have faster execution speeds, the “Pro” or “Pro+” subscription is required. In my opinion, for anyone serious about smart home automation, the Pro plan is well worth the small monthly investment for the creative freedom it unlocks.
My Final Verdict: The Glue of the Smart Home
Think of IFTTT as the universal glue for your digital life. It fills in the gaps left by the major ecosystems like Alexa and Google Home, allowing for a level of personalization and cross-platform compatibility that is simply unmatched.
Start with the free plan. Explore the pre-made Applets available in the app. Then, try building our location-based lighting Applet. Once you experience that first moment of truly seamless, custom automation, you’ll start seeing IFTTT opportunities all over your home.